Τρίτη 20 Ιουλίου 2010

fuel tank restoring part2


adding baking soda and with the help of an old battery and a smart charger i do electrolysis
electrolysis is not aggressive against metal and it makes rust back to metal
rust is removed by metal bits, screws and chains inside the fuel tank and agitate
- is connected to a good ground of the tank and + to a metal doner, like a big steel screw, keeping in mind that it should not touch the tank, to prevent short circuit

Δευτέρα 19 Ιουλίου 2010

fuel tank restoring part3


electrolysis works as you can see
the big steel screw was sucrifice as the positive electrode, anode
i used duct tape to close the pet cock openings

Κυριακή 18 Ιουλίου 2010

fuel tank restoring part4


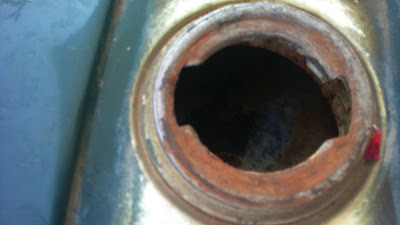
this is how the inside of the fuel tank looks like, after being treated with electrolysis for 8 times, in a period of 8 days
the old tank sealer looks like bubbles and underneath it, there is plenty of rust as you will later see

Σάββατο 17 Ιουλίου 2010

fuel tank restoring part5


the old tank sealer can be easily removed by paint remover with methylene chloride
tap every hole, insert pant remover, cose the cup, agitate and let it inside for 5 minutes
the old sealer is destroyed, but needs the help of the free moving chain and screws to be removed
do not add water, only white spirit, because everything inside the tank will be stucked

repeat this procedure until all the old sealer is removed and then apply water under big pressure

Παρασκευή 16 Ιουλίου 2010

fuel tank restoring part6


here you can see how the old sealer lloks like disolved with paint remover and white spirit

do not through away and do not empty this liquid to wc, but reuse it after filtering it with a towel or a paper, because it is still active

repeat this procedure for 3 times, dont forget to agitate continuesly and use fresh paint remover and white spirit, until you can seen nothing inside the fuel tank

Τετάρτη 14 Ιουλίου 2010

fuel tank restoring part8


now, after a good wash, we can remove every bit of the rust ta sat underneath the old sealer, with the chemical rust remover

insert it into the tank, agitate, leave it for an 10 minutes, then agitate and leave it to anothter position
soon, every spot inside the tank will have been treated with rust remover and then you can rinse it with water

Τρίτη 13 Ιουλίου 2010

fuel tank restoring part9


after derusting, you can use rust stabilizer, to make deep rust inactive
follow the previus procedure, agitate alla the time and rinse with fresh water

then, one of the most important step of this procedure is to dry inside the fuel tank
i used my air compressor, for 2 houres and then i left the fuel tank under the sun on a greek summer noon.

Κυριακή 11 Ιουλίου 2010

fuel tank restoring part10


por15 is one of the best tank sealers, that money can buy
use it in a well ventilated area, close the holes with duct tape, poor it inside, close the cup and SLOWLY agitate, in order not to make bubbles inside
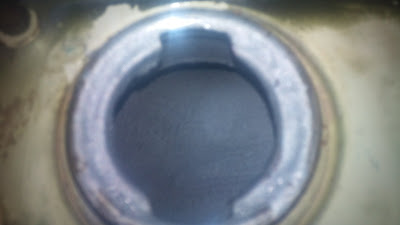
at fist, it is like silver metal car paint and as the time goes dy, it flows like honey and after an hour or so, it turns to skin
you sould pay attention to aplly it all over the fuel tank, inside, to leave no place untreated and to remove it before it starts to turn to skin
this is how it looks like after four or five houres